


Router Configuration via Setup Mode: System Configuration Dialog
Configure a Cisco router through the Setup Mode question-and-answer dialog. Connect with PuTTY, set hostname, passwords, and IP addresses — the fast path for initial router setup.
Lab Objective
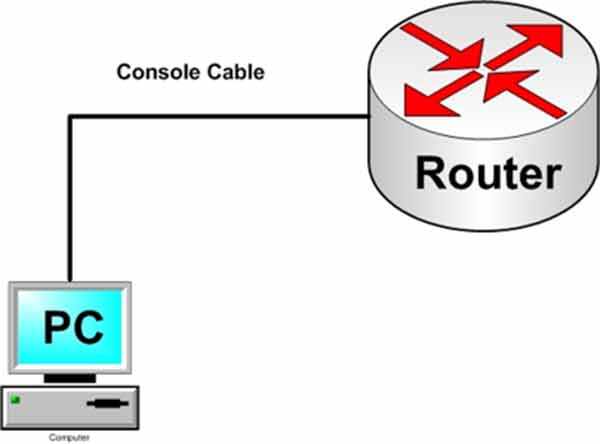
- Connect a router to a PC for configuration
- Configure PuTTY for a serial connection to the router
- Run the initial Cisco router setup using the System Configuration dialog (setup)
- Complete basic router configuration
🛠️ Equipment Needed for This Lab
- A computer with PuTTY installed
- A console cable (rollover cable)
- A Cisco router
What Is Setup Mode?
If the router hasn’t been configured yet — and no configuration file exists in NVRAM — the boot process detects this and asks whether you want to enter Setup Mode. Setup Mode is a question-and-answer dialog called the System Configuration dialog.
The CLI (Command Line Interface) is the alternative. In CLI mode, you configure the router manually using commands.
Setup Mode handles basic router configuration: setting the hostname, configuring passwords for router access, assigning IP addresses, and setting up Telnet. For advanced configuration, you’ll switch to CLI mode.
Step 1: Connect the Router to the PC via Console Cable
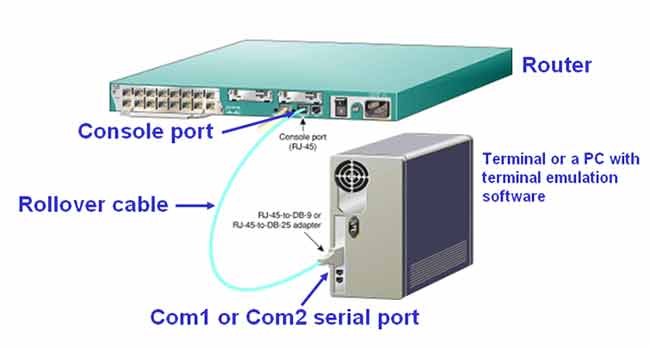
Connect the console cable from the serial port on the PC to the COM port. Connect the RJ-45 connector to the Console port on the back of the router, as shown in the image below.
Step 2: Configure PuTTY for Serial Connection
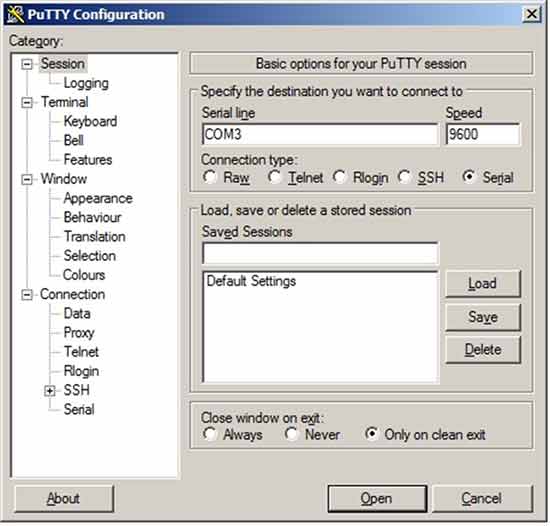
Use PuTTY to connect to the router. HyperTerminal is another option — it ships by default with Windows XP and some Microsoft operating systems. In this lab, we’ll use PuTTY.
Screenshot: Running the PuTTY executable on the PC — appears here.
In PuTTY, set Connection type to Serial. In the Serial line field, enter the PC’s serial port that’s connected to the router — in this example, COM3. This depends on which serial port you used for the console cable. Set Speed to 9600, which is required for Cisco equipment.
Click Open to connect to the router through the Console port.
Note: If you’re using a USB-to-Serial converter, the system assigns a virtual serial port to it in software. Use that virtual serial port in PuTTY to connect to the router.
What Happens at Boot: POST
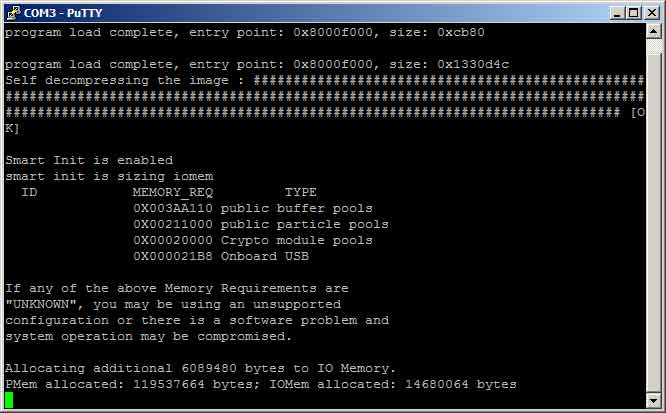
After you power on the router, the first program to run is POST (power-on self-test). POST is stored in ROM. It tests all router hardware components — processor, memory, and interfaces.
If the router isn’t configured yet, the boot process can’t find a configuration file in NVRAM. It then asks whether you want to enter Setup Mode, as shown in the image below.
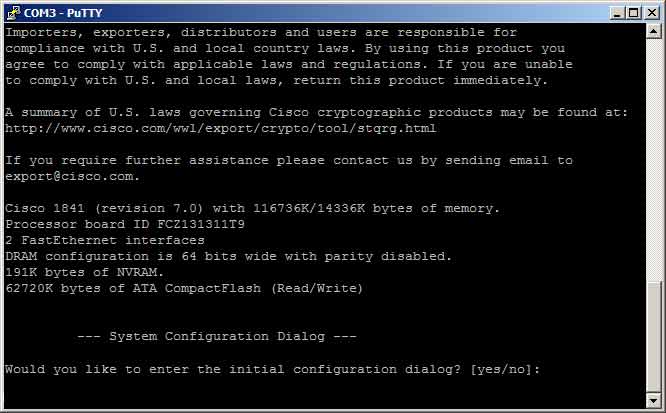
Would you like to enter the initial configuration dialog? [yes/no]:
Option A: Choose No — Enter CLI Mode
If you choose No, you’re taken to the router’s CLI mode. From there, you configure the router manually. Cisco engineers and anyone familiar with Cisco IOS commands use CLI mode to configure routers and switches.
After entering CLI mode, you’ll see the router prompt — ready for manual configuration:
Router>
Option B: Choose Yes — Enter Setup Mode
If you choose Yes to the configuration dialog, you enter the question-and-answer setup process.
Step 1: Interface Summary
The first screen shows a list of the router’s interfaces, their IP address status, and whether they’re enabled:
Current interface summary
Interface IP-Address OK? Method Status Protocol
FastEthernet0/0 unassigned YES manual administratively down down
FastEthernet1/0 unassigned YES manual administratively down down
Serial2/0 unassigned YES manual administratively down down
Serial3/0 unassigned YES manual administratively down down
FastEthernet4/0 unassigned YES manual administratively down down
FastEthernet5/0 unassigned YES manual administratively down down
Record your observations in the table below:
| Interface | IP-Address | OK? | Method | Status | Protocol |
|---|---|---|---|---|---|
| FastEthernet0/0 | unassigned | YES | manual | administratively down | down |
| FastEthernet1/0 | unassigned | YES | manual | administratively down | down |
| Serial2/0 | unassigned | YES | manual | administratively down | down |
| Serial3/0 | unassigned | YES | manual | administratively down | down |
| FastEthernet4/0 | unassigned | YES | manual | administratively down | down |
| FastEthernet5/0 | unassigned | YES | manual | administratively down | down |
Step 2: Set Hostname and Passwords
Next, Setup Mode prompts you for the router’s hostname. Press Enter to accept the default hostname (Router).
Enter host name [Router]:
Then you’re asked for an enable secret — the password used to enter Privilege Mode.
Enter enable secret:
You’re also asked for a terminal password — used for Telnet access.
Enter terminal password:
Note: Most of the time, you won’t use Setup Mode. You’ll configure the router manually in CLI mode, which supports the full set of IOS commands.
Step 3: Choose How to Save
After completing the setup process, three options appear. Choose one:
| Option | What It Does |
|---|---|
| [0] Go to the IOS command prompt without saving this config. | Takes you to CLI mode without saving the Setup Mode configuration. |
| [1] Return back to the setup without saving this config. | Returns you to the beginning of Setup Mode without saving. |
| [2] Save this configuration to nvram and exit. | Saves the Setup Mode configuration to NVRAM and takes you to CLI mode. |
Enter your selection [2]:
Default: Option 2 is selected by default. Press Enter to save the configuration to NVRAM and exit to CLI mode.
✅ Key Takeaways
- Setup Mode is a question-and-answer dialog for initial router configuration.
- It appears automatically when the router has no configuration file in NVRAM.
- PuTTY connects to the router via serial with speed set to 9600.
- POST (power-on self-test) runs from ROM before the router boots.
- Setup Mode configures hostname, enable secret, terminal password, and interface IP addresses.
- Option [2] saves the configuration to NVRAM and exits to CLI mode.
- For advanced configuration, use CLI mode instead of Setup Mode.
