


Physical Connection: Router to PC for Configuration
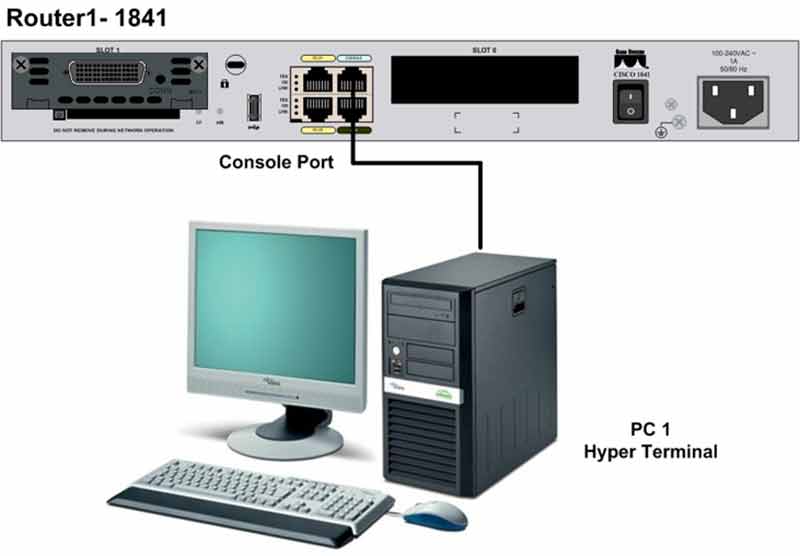
Connect a Cisco router to a PC using a console cable. Learn to identify console ports, serial interfaces, USB adapters, and rollover cables — the essential first step before any configuration.
Lab Objective
- Physically connect a router to a PC using a console cable
- Identify the Console port on the router
- Identify the serial port on the PC
- Identify USB console ports and serial-to-USB adapters
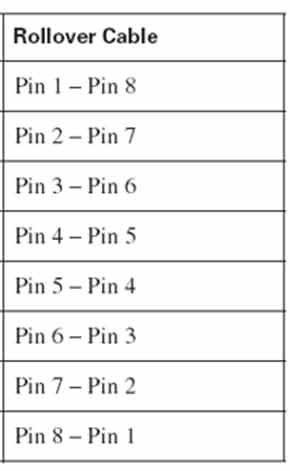
- Recognize the console cable and its pinout
🛠️ Equipment Needed for This Lab
- A computer with a serial interface (or USB-to-serial adapter)
- A Cisco router
- A console cable (also called a rollover cable)
Why Console Connection Matters
In this lab, you’ll connect a router to a PC using a console cable (also called a rollover cable) so you can configure it.
You can configure Cisco routers, switches, and other devices through the Console port. Cisco equipment is always configured through the console port the first time. Once you have console access, you can configure and enable other access methods like Telnet, SSH, and AUX.
In this method, the router (or switch, or other Cisco device) connects to a computer through the Console port using a console cable, as shown in the diagram below.
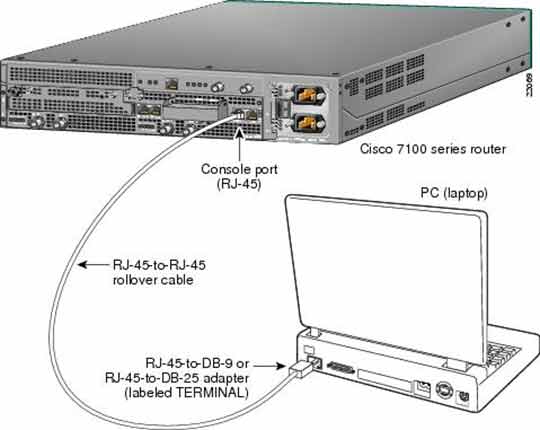
Diagram: Cisco router connected to a PC via console cable — appears here in the full lab.
Step 1: Identify the Legacy Console Interface on the Router
In the zoomed image below, you can see the Console port on the back of a router. Pay attention to its location — it’s labeled Con 0 or Console 0 on the rear panel.
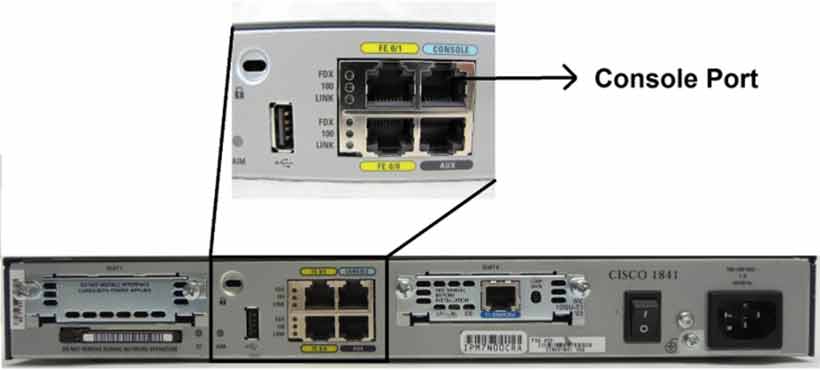
Zoomed photo: Console port (Con 0 / Console 0) on the back of a Cisco router — appears here.
Step 2: Identify the Serial Interface on the PC (COM 1 or COM 2)
The image below shows a 9-pin serial interface (COM 1 or COM 2) on the back of a PC. Pay attention to its location. Some PCs have a 25-pin serial connector instead.
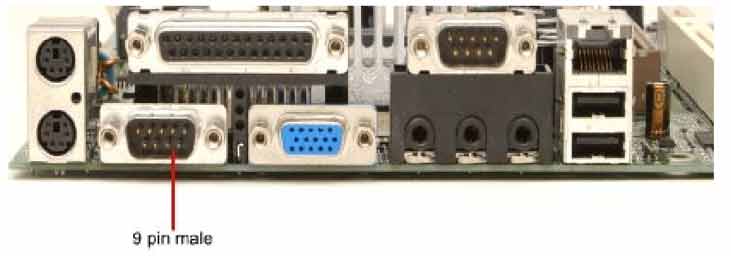
Photo: 9-pin serial port on the back of a desktop PC — appears here.
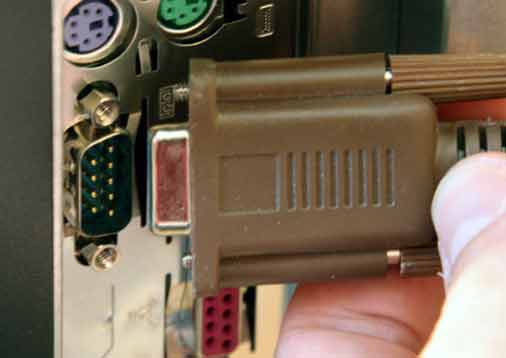
Photo: Another view of the 9-pin serial connection location — appears here.
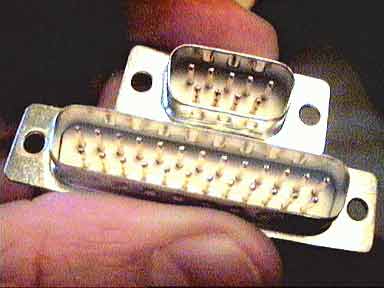
Photo: Both 9-pin and 25-pin serial connectors side by side — appears here.
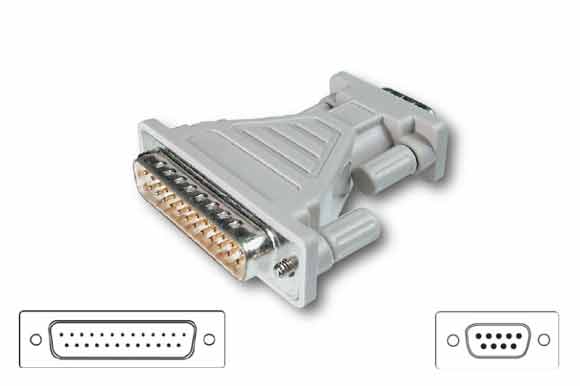
Photo: 25-pin to 9-pin serial adapter — appears here.
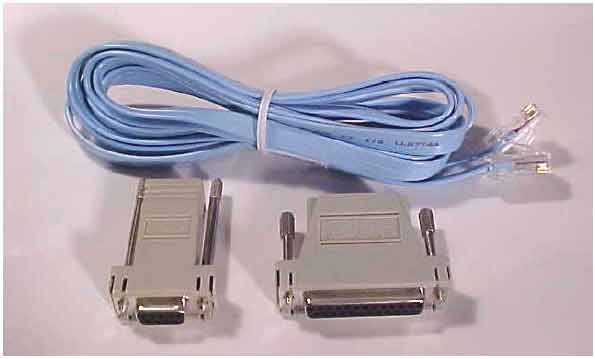
Photo: Console cable with both 9-pin and 25-pin connectors — appears here.
Step 3: Identify Legacy Console Cables and Their Pinout
The image below shows a legacy console cable that ships in the box with Cisco equipment like routers and switches.
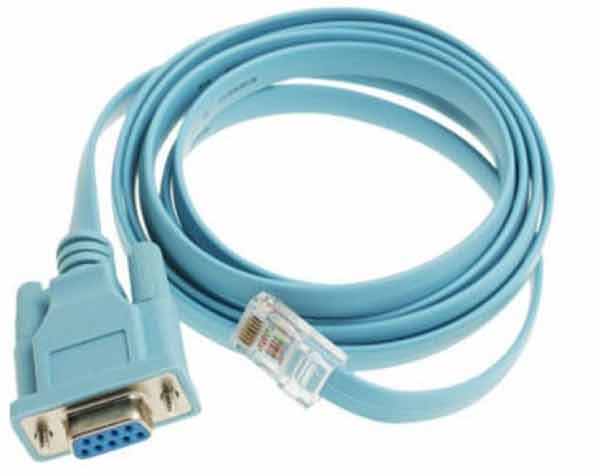
Below that, you’ll see the pinout diagram for building a legacy console cable.
Modern laptops no longer include serial ports. To connect these laptops to a router, use a USB-to-serial converter (shown below).
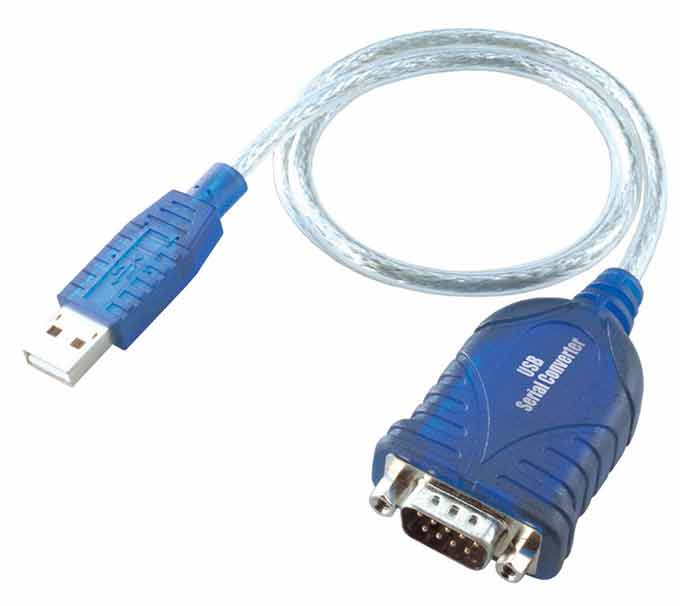
Photo: Legacy console cable included with Cisco routers and switches — appears here.
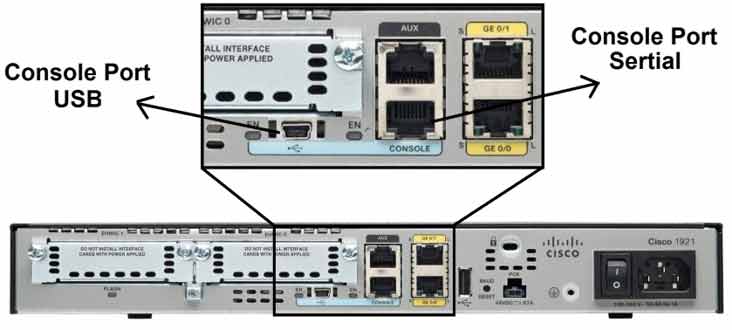
Photo: USB-to-serial converter for connecting a console cable to a laptop — appears here.
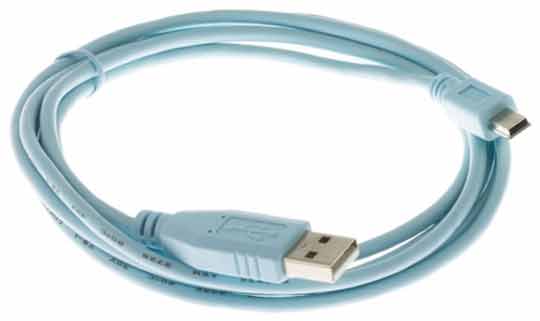
Note: The USB-to-console cable converter requires a software driver. Install the driver on your computer before use.
Step 4: Identify the Modern Console Interface on the Router
Cisco’s newer routers and switches — like the 1900, 2900, and 3900 series routers, plus the X Series and S Series switches — support a USB Console port in addition to the legacy console port. This lets you connect a computer directly to Cisco routers and switches using a USB cable.
In the zoomed image below, you can see the USB Console port on the back of a modern Cisco router. Pay attention to its location — it’s marked with a USB symbol.
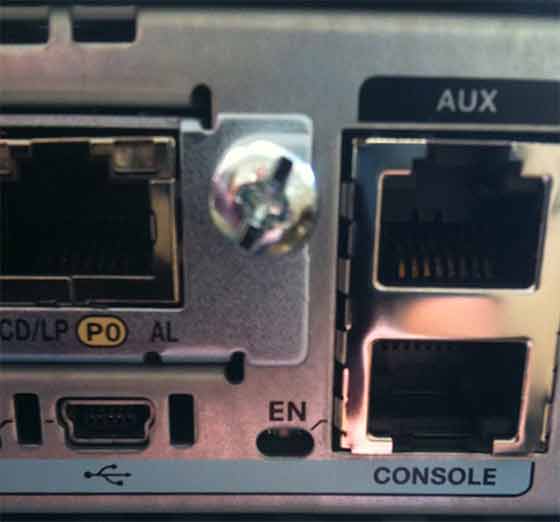
Zoomed photo: USB Console port on the back of a modern Cisco router — appears here.
- The Console port is the primary method for initial Cisco device configuration.
- Legacy routers use an RJ-45 console port labeled Con 0 or Console 0.
- Legacy PCs use a 9-pin or 25-pin serial interface (COM 1 or COM 2).
- A rollover cable (console cable) connects the router to the PC.
- Modern laptops need a USB-to-serial converter with a driver.
- Newer Cisco routers and switches also support a USB Console port.
- After console access, you can enable Telnet, SSH, and AUX for remote management.
